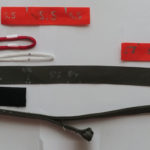
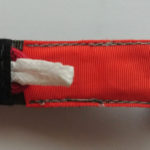
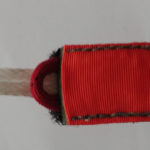
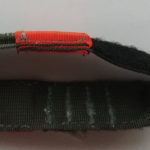
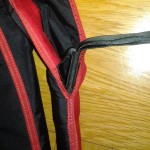
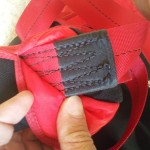
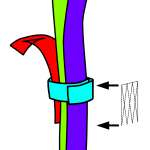
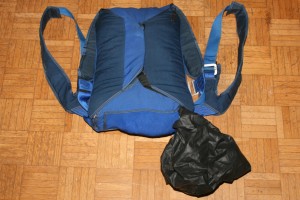
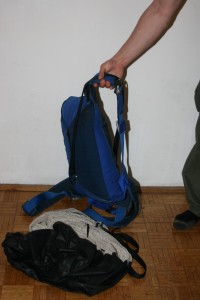
Dialing in a custom DBS

There’s a lot of information and discussions out there on how to locate your custom deep brake setting (see Asylum / CR article, or search on basejumper.com), and why that is a good idea if you jump solid slider down objects. So this is mainly about a little hack of mine that makes the job of changing the brake setting in between test jumps way easier. However, I write a bit on my approach at the bottom.

When setting up your custom DBS, you will have to do a number of test jumps off some safeish span to locate and verify it. For those jumps you’ll have to try out different brake settings, and there’s a number of ways to achieve this, but all I’ve seen up to this point involve some stitching to modify it in between jumps. (Most popular, moving the spliced loop of the lower steering line at the cascade end)

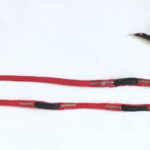
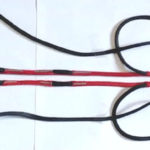
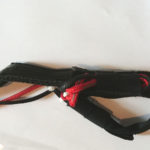
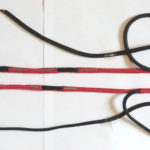
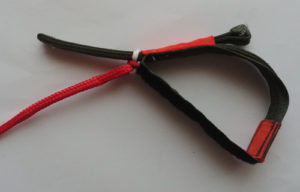
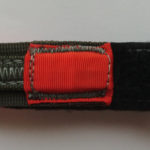
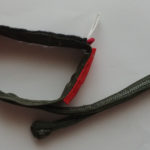
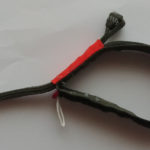
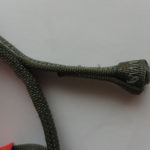
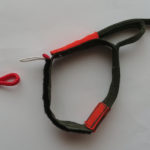
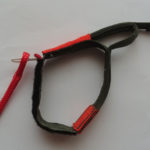
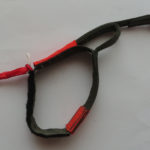
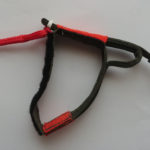
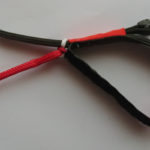
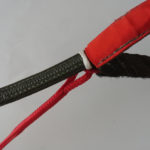
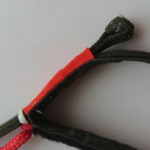
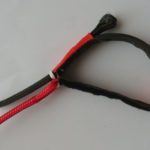
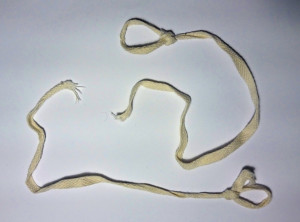
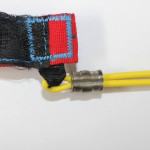
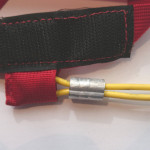
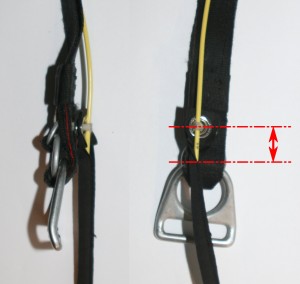
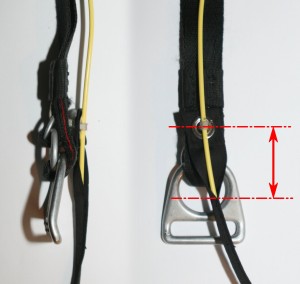
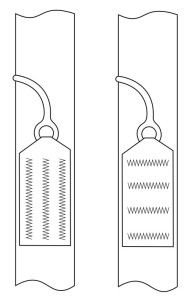
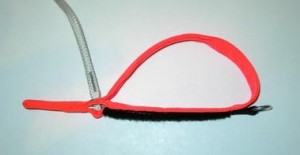
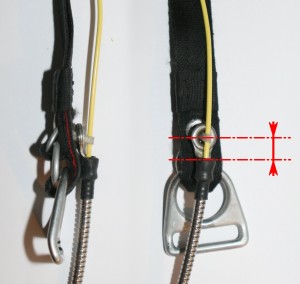
So to save myself from bringing a sewing machine, do any hand tacking or seam picking in between test jumps I came up with this idea to change the brake line length with a long splice instead. Lines shrink when spliced, for 900lbs Dacron that’s approximately 1.25cm (~1/2″) for a 10cm (~4″) splice. (or vice versa 1cm shrinkage for 8cm splice)
The mandatory liability bit on posts like this: THIS IS NOT APPROVED OR ENDORSED BY ANY MANUFACTURER, DO AT YOUR OWN RISK.

So, what you’ll need for this:

  • some 900lbs Dacron line (so the same stuff your lower steering lines are made from)
  • a splicing needle appropriate size for the 900lbs Dacron line
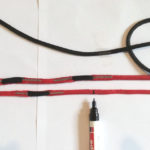
  • a sharpie (or whatever marker brand you prefer)

If you’ve done this before you should have an educated guess on how much deeper your brake setting probably going to be. If you do this the first time, have someone have a look at your openings and judge if it is far off from optimal, to give you an idea, I’ve never did one more than 10cm (~4″) deeper.

How to do this:

Start by:

  • Tie both brake lines at the cascade end down to some fixed anchor.
  • Get 2 equally long pieces of loose line (900lbs dacron), I’d recommend somewhere in the range of 1m.
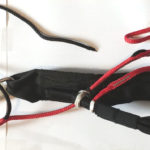
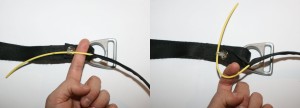
  • Splice the line pieces into the lower steering line, starting just above of where the splice of the shallow brake setting ends, always leave at least 10cm of line sticking out at the brake setting end!
  • Start off with splicing them in a long way, therefore shortening the line a lot. (I have my first run pretty much always too deep and open in a stall, this is a good thing, because now you’ve got only one direction to work towards. DO THIS ON A SPAN ONLY!)
  • Make sure both lower steering lines are the SAME length. (Tension the lines! Atair recommends 30N / 6.6lbs for checking trim of lower steering lines, so I’d recommend something in that range)
  • Pack – Just stow the open line end that is sticking out together with the rest of the steering line on the back of the riser.
  • Jump. (Be aware that your control stroke is also shortened for those test jumps)
  • Evaluate. (Have someone get video, a bit more on this at the bottom)

Too shallow:

  • Start at the beginning with a longer splice.

Too deep:

  • Tie both brake lines at the cascade end down to some fixed anchor.
  • Pull one of the spliced line out a bit, watch your progress by comparing both steering lines brake setting side by side until it is shallower by the desired amount compared to the other one.
  • Pull out the other sides spliced line the same amount and make sure both lower steering lines are again the same length again.
  • Pack.
  • Jump.
  • Evaluate.
  • Repeate.

Just perfect:

  • Tie both brake lines at the cascade end down to some fixed anchor.
  • Remove the spliced line completely from one(!) breakline.
  • Tension both steering lines side by side.
  • Mark the location of the brake setting of the shortened line on the cleared line.
  • Done. This mark is where your custom DBS has to go.

Before continue jumping:

  • Remove the other splice.

Adding the new custom DBS:
The splices are not a way to permanently shorten the brake lines to achieve a custom DBS!
Since you probably don’t have the room above the factory DBS to add another one with squirrelstyle_brake_settingappropriate splice lengths the proper way would be:
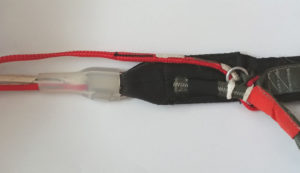
Remove the brake settings completely, and using a longer inner splice create three new brake settings with the lower ones being exactly where your factory deep and shallow settings were and the highest one as your new custom setting. Or alternatively get completely new lower steering lines with this exact setting.
The hackidy-hack way:
I just add squirrel style brake settings using 1000lbs spectra on top of the existing factory brake setting. Keep in mind that this additional splice will deepen your factory brake settings (and control stroke) by ~1cm, and probably will weaken the line a bit more than the appropriate method above. One thing to watch out for here is to not have the end of the splice be on the same point as the existing splice of the factory setting! (Again, this is not approved by any manufacturer, do at your own risk.)

Everyone attempting this should know so much about rigging and parachute lines, but I still want to add this:cut_at_angle
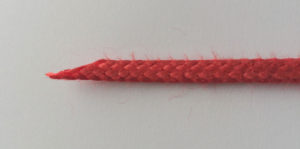
ALL splice line ends have to be cut at an angle! (And never ever take a lighter to melt the ends)
The point where the splice ends inside the line is a stresspoint, it’s the point where the line goes from thick to thin, and cutting the spliced end at an angle reduces the stresses occurring in the line. This should be as smooth and continuous as possible, still this will always be the weak point of any line. When looking at lines broken due to overload, they will always break on the point at the end of a splice. Eg. Broken center A-B lines due to overload will (given no prior damage) break at the point where the B splice ends inside the A line at the cascade.

The method I use for evaluating a brake setting I got recommended by Tom Aiello some years ago:
Do test jumps in as little wind as possible. After canopy starts flying try to do an avoidance backriser turn. The canopy should still be able to turn, and not stall the other side. This is best checked on video from above, if the center cell looks like it is un-stalled, and the un-stalled side circles around the stalled side its fine. If the other side stalls or struggles coming around the setting is still too deep.
Be aware that it is not just about getting the minimum speed after opening without stalling, but the minimum speed that still allows you to steer! This range of brake setting that is flying, but not steerable can vary with every canopy, but especially on slatted models this can be a rather large range. So be aware of this!

Posted in Rigging, Safety | Leave a comment

Brake Line Release Toggles

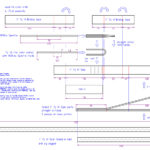
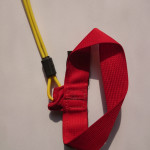
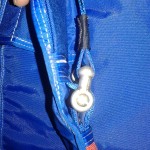
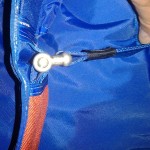
attaching5This idea of mine has been in circulation for some time now and I’ve been handing out the plans and measurements. So here now the polished (not handdrawn on a napkin) documentation on how to build my brake line release toggles.

I tried to solve some issues that bother me with other designs, so the design goals were:

  • Make them easily maintainable, therefore enable the next rigger to easily and quickly replace the velcro or other maintenance parts without having to take any other portion of the toggle apart.
  • Easy to manufacture, and as little parts as possible.
  • No metal or cable parts.

This of course comes at a cost:

  • Higher pull force to release than other designs.
  • In some spots tight manufacturing tolerances. (highlighted below)

The pdf version and the dxf (Autocad or Librecad) files.

I publish this under GPLv3 (see details at the bottom and full licence text here), in short, you can modify, distribute, use this commercially, as much as you want as long as you publish your modifications openly under the same licence and attribute the original author.

A few notes and things to watch out for when building:

  • Build yourself a little folder tool for manufacturing the folded 1″ square weave portions.
  • The short and long piece of folded 1″ square weave are to be 301 straight stitched together.
  • The nose portion is to be 301 straight stitched with 2(!) passes to give it more stiffness.
  • This has been tested with 1000lbs Spectra for the loop portion. Do not use anything heavier because it can lead to hesitations when releasing since heavier line will not be easily bent back through the red loop on release. Do not use excessively thinner, because it can cut into the toggle nose more and therefore increase the pull force required for releasing. Do not use anything but spectra, it has the lowest friction coefficient of all common line types, everything else will increase pull forces.
  • The distance inbetween the point of where the orange tunnel on the back of the toggle ends, and the point where the folded 1″ square weave material is stitched to the back of the toggle is critical. Too far and the nose can easily be “pushed” from the top, too close and the toggle becomes hard to release or the nose cannot retract enough anymore to release in the first place.
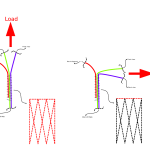
  • The lenght of the two loops is critical. The white loop has to be long enough to have some of the load put on the red loop when load is put on the break line. The red loop should be tight, but not too tight for obvious reasons.
  • If the tape tunnel for the toggle nose is too tight, releasing the line will require more force. (duh.)

Rigging / Attaching the toggles to the brake line:


Copyright (C) 2016  Thomas Hirsch

This information is free; you can redistribute it and/or modify it
under the terms of the GNU General Public License version 3 as published by
the Free Software Foundation.

This work is distributed in the hope that it will be useful,
but WITHOUT ANY WARRANTY; without even the implied warranty of
MERCHANTABILITY or FITNESS FOR A PARTICULAR PURPOSE.  See the
GNU General Public License for more details.

You should have received a copy of the GNU General Public License
along with this work; if not, write to the Free Software
Foundation, Inc., 51 Franklin Street, Fifth Floor, Boston, MA 02110-1301, USA.

Posted in Documents, Rigging, Safety | Leave a comment

Counter-twisting method for dealing with linetwists

This has been out there for a long time I guess, but just recently found its way to a greater audience via Youtube and Facebook (eg. Cris video here, Yuris video here), and its being teached in multiple FJCs.

Since I finally managed to capture some footage of this myself, and always felt that theres some important info missing in all the existing posts about this, I finally got off my lazy ass to write something for this blog after a rather long period of silence.

So here it goes:

The counter-twisting method for dealing with linetwists

In theory its pretty straight forward –

  • grab your risers at the fleshiest part, the links / where the risers are sewn at the line end
  • twist in counter direction of where your body is spinning
  • don’t accidentially pop your toggles while doing so

Why do this?

To get twists up there in the lines down to the risers, which then enables you to reach over the twist to steer your canopy, and to give you some leaverage with your hands for quicker untwisting.
It’s rather quick when done properly and a skill worth knowing, because climbing your lines above twists sounds way easier than it acutally is and sometimes thats just not gonna work, eg. spectra lines will give you a hell of a time trying to climb them.malfunction_trainer

The key to success is, as with most other skills, training and visualization. What I see a lot at the FJC, is people twisting in the wrong direction, not grabbing the risers at a good spot to get some leaverage, etc., followed by a lot of improvement within just a few tries.
So whenever you get the chance to put yourself in a “malfunction trainer” like the one at Darijans place at the Croatian bridge, give it a spin and do a few training twists, no matter your current experience level.


And the important info I found missing in all other posts…

DON’T DO THIS ON YOUR SKYDIVE RIG!

On a skydive rig you want to be able to perform a cutaway and go to the reserve if you cant get out of the twists. And here lies the problem – cutting away can become a significant issue when risers are heavily twisted due to two things:riser_housing1

  • The overlenght of the cutaway cables is twisted together with the risers giving you significant friction to overcome when pulling the cutaway handle. Yes, as of today most rig manufacturers put some kind of hardhousing in the risers to remedy this, but you shouldn’t deliberately twist the risers under a high G spinning malfunction to test the limits of those housings.
  • Theres additional force added to the 3 ring and the white loop due to twisting deformation on the 3 ring portion of the riser. Small 3 ring risers already have tight tolerances to work properly, and will always produce higher pull forces than big 3 rings, and deforming this whole setup isn’t going to help.

There have been incidents where people had a really hard time to cutaway. See this article for more info on this topic or do a search on dropzone.com.

So please, while this is a perfectly fine, even recommended practice for base jumping, its not something you should bring to the dropzone. You’ve got a reserve there, don’t stack the odds against yourself by trying to fix your main.

Posted in Safety | Leave a comment

2016

I’m getting lazier every year, so my videos are getting shorter. So heres some of my most fun and memorable moments from 2016 cut down to just under a minute.
Thanks to everyone involved!

https://vimeo.com/205594983

Music:
“Sunday” by Golliwog
from the album “More than meets d.i.y.”

https://golliwog.bandcamp.com/
http://golliwog.org

Posted in Videos | Leave a comment

Throw it as you mean it

I’ve written about this already 5 years ago in my second post on this blog, but since more video material accumulated in my collection over those years, I thought its worth a more extensive video, so here we go:

https://vimeo.com/183051913

Music: “Hola Hola Bossa Nova” by JuanitosCC BY 2.0 FR

  • Pull and throw in one single motion.
  • Throw it as you mean it.
  • Don’t hold on to your PC after pulling it out of the BOC.
  • Don’t bring the PC forward against the airstream.

I’m aware that there are certain PC packing techniques that are intended to prevent bridle / PC entanglements, but none of this will help if you do not get the pull and throw right.

Thanks to the jumpers sharing footage, you know who you are.

Posted in Safety | Leave a comment

2015

After only a few jumps and a longer brake in 2014, 2015 was again a blast. Thanks to all the jumpers, pilots, drivers, groundcrews, and especially to Andi, Stephan, Mahle, Ferudun, and all the other event and boogie organizers.

https://vimeo.com/148858375

Music:
Biting Dogs Don’t Chew
by
Astpai
astpai.bandcamp.com
facebook.com/ASTPAI

Posted in Videos | Leave a comment

Breakcord

I just got a new roll of 80lbs breakcord and I tried to figure out if temperature and humidity had some effect on its breaking strength. I’m talking about the standard 80lbs cotton break tape (MIL-T-5661) that we use for staticline jumps, and which you can get from paragear on a roll or in smaller amounts form your favorite base gear manufacturer.

breakcord_loop

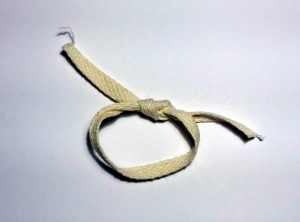
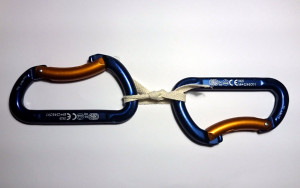
For the pull tests I used 25cm pieces of breakcord, tied to a loop with a surgeons knot and attached in between two climbing carabiners for measuring. I did ten pull tests for each “treatment”, except the reference, that was done 20 times.

pull_setup

The test setup was pretty rudimentary, and since I don’t own a calibrated scale the absolute numbers are maybe off by a bit, but for comparing differently treated breakcord on the same setup it was sufficiently accurate, and the standard deviation showed to be not that big for each test set. (see table)

In each batch there was quite some variation, I suppose most of it is due to the knot and possible twists in the breakcord, in the reference batch for example I got values as low as 64kg and as high as 70kg, however the change in breaking strength for some “treatments” were way beyond that range and consistent.

  • Reference
    Straight off the roll and pull tested, no special treatment.
  • Wet
    Soaked in water, pull tested wet.
  • Wet then dried
    Soaked in water, then let dry for 24 hours.
  • Frozen
    Put in the freezer for 12 hours, pull tested within 5 minutes of taking it out of the freezer.
  • Frozen wet
    Soaked in water and put in the freezer for 12 hours, pull tested frozen.
  • 1h at 100°C
    One hour in the oven at 100°C, pull tested within 5 minutes of taking it out of the oven.
  • 1h at 100°C then cool down
    One hour in the oven at 100°C, left at room temperature for 24 hours before pull testing.
  • 1h at 50°C
    One hour in the oven at 50°C, pull tested within 5 minutes of taking it out of the oven.


  Average breaking strength (kg) % of reference std. Deviation (kg) % deviation
Reference 66.2 100.0% 2.1 3.1%
Wet 77.9 117.7% 2.3 2.9%
Wet then dried 66.4 100.3% 3.9 5.9%
Frozen 65.6 99.1% 3.4 5.2%
Frozen wet 77.0 116.3% 2.6 3.4%
1h at 100°C 41.7 63.0% 4.8 11.4%
1h at 100°C then cool down 63.0 95.2% 4.5 7.1%
1h at 50°C 50.7 76.6% 3.7 7.4%


Findings
I was surprised that the soaked wet breakcord was significantly stronger than the reference, after testing that batch I read up that cotton is actually getting stronger when it is more humid, or even soaking wet. Sub 0°C temperature had pretty much no effect, while exposure to high temperatures showed a big decrease in breaking strength, which reversed after storing it at room temperature for some time again.

I suspect the reduction in breaking strength after exposure to higher temperatures in my kitchen oven are partially due to drying the breakcord further, reducing the water content in the cotton fibers compared to the reference batch. Since at the time I pull tested the last of those batches, the breakcords didn’t feel warm anymore but still had significantly reduced breaking strength. If I can come up with a better test setup to verify this I will update this article. (I’m happy to hear any suggestions)

Additionally to the tests above, I tried to find out if the breaking strength of a piece of cord changes when it is loaded to the limit multiple times. To do so I started off with multiple 1.50m pieces of breakcord and knots on both ends, breaking the single strand of cord again and again.
I could not measure any difference in breaking strength, even after pulling a piece of cord to breaking load for the 5th or 6th time. However, from the 3rd time breaking the same piece of cord on, some started breaking somewhere in the middle, and not at the knots anymore.

single_strand_broken

Something is going on there, although hard to measure. It seems that a piece of breakcord is actually damaged/weakened at random spots along its length, if it has been brought close enough to its breaking strength before. This could theoretically become a problem if this invisible weak spot would line up with a stress point at the knot at its next use, adding up the reductions in breaking strength.

To sum this up

  • Store your breakcord properly.
  • Cut pieces as you need them instead of trying to somehow rip them.
  • Don’t reuse breakcord that has been loaded already.
  • Don’t put it in your oven before using it.

lots_of_broken_cord

Posted in Safety | 2 Comments

Slider down vs. Slider off

On one of my recent slider down jumps I had a 180 and encountered an issue with the slider that I never really thought about or realized before – grabbing the slider together with a backriser.

Here’s just a brief summary of the pros and cons of slider down and slider off configurations, scroll down to the video for the jump and my analysis.

Slider down means leaving the slider on and securing it to one of the risers, while slider off means that the slider is taken off the rig entirely.

Slider off configuration reduces the anhedral angle of the canopy a bit and makes it glide and flare slightly better. Also packing will be a bit cleaner and faster since its one component less to take care of. The downside is that reconfiguration from slider off to slider up and vice versa takes longer, requires tools, and introduces the chance of misrigging.
Slider down makes it a lot quicker to switch from slider up to slider down and vice versa without any tools required and less opportunities for misrigging. On the other hand, packing takes a minute or two longer because you have to take care of the slider and stow it properly.

There are a few things that I fucked up there, first, I grabbed the backriser too low, limiting the amount of steering input I could apply, and second, I got some portion of the slider in my hand, giving me an unusual feeling of steering pressure at some point because I was also pulling on the front riser via the slider and further limiting the turnrate I could achieve.
slidergrab1When I realized that I got my hand on the riser too low and I’m not turning as quick as I would have liked to I shortly thought about going to toggles but ditched the idea because I was too close and was afraid that releasing an grabbing again would surge me into the cliff face. So I used my left hand to apply further input on the right riser to turn faster.
After completing the turn I knew that I felt the slider in my hand during the maneuver but until watching the footage I was not fully aware of what exactly I got in my hand there and when it popped out of my grip, as well as that my hand was in the toggle. Also there was a slight side wind coming from right as seen from the top. I did the evasive turn towards the right because it didn’t feel like a 180, more like 120-140, most likely due to me being spun round in that direction. This led me to turn downwind moving along the wall during the maneuver, while turning the other way would probably would have turned me nicer on the spot. Although I honestly don’t know if a riser-stall-turn has higher turnrate turning into or away from winddirection right after opening. (I will give it a few tries at the bridge and update this article.)

And finally, my learnings from this jump:

  • I’m not going to be a lazy bastard anymore and will take the slider off as I always did until the last year or so.
  • I’m going to the bridge for a lot of offheading drills to keep me from grabbing too low on risers again next time. I had a lot of 180s yet, and dealt with all of them very well up to this point.
  • What saved my ass here was the running exit with a strong push, and that I was quick on my riser, although too low…

For matter of completeness, heres how I stow my slider for slider down jumps.

Posted in Packing, Safety | 4 Comments

Cutaway Handles

handle3 ring systems on base rigs are rarely used under load, I suppose for the majority of jumpers, me included, it’s mostly used for switching canopies and the occasional planned water landing, where in both cases theres barely any tension on the risers. But even if you’re not doing any cutaway shenanigans, you expect the 3 ring to do its job properly when under load for those oh-shit moments like landing in moving water, so you should keep it in good condition.

I don’t want to go into detail with the whole 3 ring maintenance thing, I want to focus on one particular issue with the cutaway handles since it can be easily overlooked when checking a 3 ring setup.

Theres a nicopress sleeve clamping together both sides of the yellow cable forming a loop where handle is attached. This sleeve has to be properly set to prevent any cable slippage.

If the nicopress sleeve isn’t properly pressed and one side experiences more pull force than the other, which is likely due to longer housing and the more complicated routing on the left side, it could happen on a cutaway that only one riser releases and the cutaway handle slips off the cable, while the other riser will stay attached to the rig.

https://vimeo.com/122703796

The nicopress sleeve on this handle wasn’t properly pressed, and the most force is required to move the bent in the cable around the tape with which it is attached to the handle, after that it just slips through. The force required is surprisingly low with this particular handle.

As Sketchy Andy demonstrated this can actually happen in real life and puts you in a very bad spot.

So include the cutaway handle in the next gear check, if you can make the cable slip by pulling on one side with your bare hands go to a rigger to get the sleeve properly pressed.

Posted in Safety | Leave a comment

Harness construction

Recently two manufacturers published service bulletins as reaction to damaged harnesses found in the field (links at the bottom of the page). There has been a lot of fuzz about this on facebook and the forum, so for those that don’t exactly know whats going on I try to give a little info on harness construction to help understand how this kind of damage can happen.
The rise of lighter gear has been blamed by some, but the harness construction pretty much stayed untouched besides favoring integrity riser (also called “build-in riser”) harnesses on some light gear over L-bars or 3 rings. So quite a lot of the “light” gear is just a low profile version with possibly a lighter container construction to save weight compared to the regular / “not-light” rigs.

Harness construction
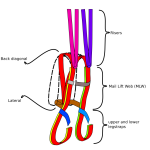
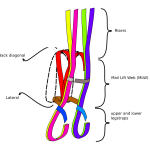
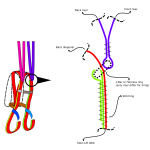
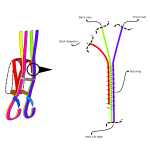
An overview on the parts that constitute a base harness, and to give you a basic idea of which piece of webbing starts and ends where and which way it follows around your body, as well as whats the difference between a harness equipped with L-bars / 3 ring or integrity risers. The pictures show how most non-articulated base rigs are made today (as of august 2014). Not all manufacturers build their harnesses in the exactly same way, but most of the differences are not apparent at this low detail level anyways. Of course there are some designs that differ quite a lot, but this should cover how most manufacturers build their base rigs.
To make this whole thing a little bit easier to comprehend I made some simplifications. Hardware, fabric buffers, confluence wraps, joints, folds are not shown, and continuous pieces of webbing have the same color. The joint that is shown in detail is the MLW / back diagonal joint, which is also simplified by not showing tersh loops that some manufacturers add, confluence wraps and buffers are also excluded.

Notable exceptions, and examples of possible differences.

  • Regarding the difference between 3 ring and L-bar setup, only the riser side differs  since the L-bar / big ring are attached to the harness in the same way.
  • On adrenalin base rigs with integrity riser that were sold from august 2014 on, the whole MLW / back diagonal / riser joint was redesigned as a reaction to damage harnesses. (see document at the bottom of the page)
  • On the squirrel stronglites, an additional piece of webbing is used to back up the same joint as reaction to a damaged harness (from august 2014 on) (see also document at the bottom of the page) as well as the leg straps are fixed size loops of webbing so that the upper and lower legstraps, lateral, MLW and risers are build with 2 continuous pieces of webbing.
  • Different ways of how hip rings are incorporated, but none of them change the way the MLW / back diagonal joint looks like.
  • Back diagonal not being a V-, but an X-shape, so that there is no separate lateral webbing, but the back diagonal extends out of the container at the bottom meeting with the MLW again. (rarely seen in the field)
  • And a lot of stuff that doesn’t make a big difference at this detail level, like the chest strap assembly, or single layer Ty7 instead of double layer Ty8 legstraps, etc.

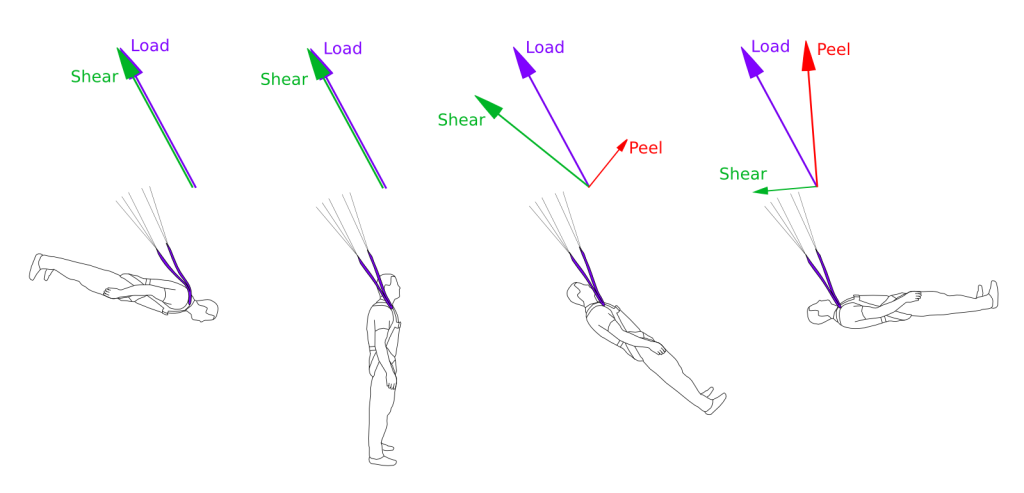
Shear vs Peel

Shear vs force

Shear vs force

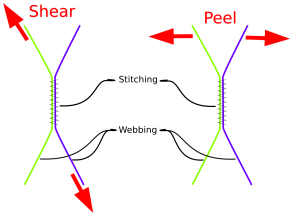
The picture to the left shows the difference between “shearing” and “peeling” a webbing joint. If you would want to rip those two pieces of webbing apart, you would end up pulling in peel direction intuitively since it will be easier to break the stitching that way. Peeling force on a webbing joint should therefore be limited or if possible completely prevented since the joint will break way earlier than with force in shearing direction.
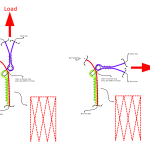
The pictures below show the MLW / back diagonal / riser joint of an integrity riser harness and a L-bar / 3 ring harness. The stitch pattern that holds together the webbing pieces is shown next to them for different pull angles, the color of the stitch patter should display how the force is distributed over the stitches (very roughly). As you can see, with an integrity riser harness you can apply a peeling force on the MLW / back diagonal / riser joint by pulling the risers away from the MLW so that only the top row of stitching is taking the load. For example, pulling on your back would give you this kind of peeling force on this joint, and it is easy to see that one could actually damage something this way.

Webbing joints
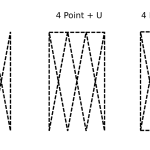
To make this joint more robust, a stitch pattern with a row of stitching across the 4 point is used (as a 4 point + U or a 4 point + box) for integrity riser harnesses. (Short example: Ty8 (1 23/32″ wide) joint, sewn with 5 cord (breaking strength of 40lbs) at 5 stitches per inch, using a 4 point with an U or box, would give you about 12 stitches in the top row, and therefore (very) roughly 720lbs (with 1.5x40lbs per stitch) of breaking strenght when only pulling on the top row. While a 4 point without the U or box would have only 4 stitches in the top row and therefore only 240lbs when pulling on the top row.)
To add another bit of strength, a piece of webbing is wrapped around the joint before sewing. This is called a confluence wrap and can make the joint by a few percent stronger, and also helps against splitting/peeling. The webbing used for this should be at least 30% of the strength of the webbings that are sewn together [Poynters Parachute manual], the material used for this part on most base rigs is Ty12 (the stuff with the red lines at the selvage) (Ty4 is also used for this).

But none of the guys that damaged their rigs were pulling on their back, so how could this happen?
Well, you don’t necessarily have to pull in a bad body position to apply some peeling force on this joint, when tracking/wingsuiting you most likely see your feet in front of you on opening. In this moment part of the force coming from the risers is partially applied in a peeling fashion to this joint. And the damaged rigs have shown that this can be quite a big amount of force, enough to do some damage to the joint. Of course, the faster the track, the heavier the person, etc. the worse, as well as an improperly sized rig adds to the problem. (In the picture below forces and angles of force are exaggerated, since in the real world the MLW is not nailed to the jumper and can move a bit, eg. be lifted away from the body reducing the angle again, but you get the idea…)

opening2How come that this problem suddenly came up at the same time with two different manufacturers?
This problem is not new. There have been similar damages on skydive rigs already long ago (since the reserve riser / back diagonal joint on a modern skydive rig is essentially the same as the joint on an integrity base rig), this is why the stitch patterns with a U or box, as well as confluence wraps became the standard we now have.
I’m not really sure why we see this cluster of incidents right now. But I suppose its a combination of a integrity risers getting more and more popular (when I started jumping 6 years ago I didn’t see that many of integrity rigs around as now), tracksuits are getting bigger and better performance wise, while untrained jumpers tend to either stall them or go way to steep and fast. And last but not least I think people see harnesses as indestructible and therefore don’t see the problem in constant hard openings or are mistreating it with by for example using chest straps for rappelling, and don’t check their gear very often.

On a personal note… (hopefully not pissing off too many people)
<Rant>
I think marketing equipment as indestructible and fail proof is adding to the problem because a lot of people will treat their gear accordingly, while showing what can go wrong, including how and why, could actually lower incident rate a bit.
I also can’t see the necessity of certifications for our harnesses, one of the manufacturers that published bulletins had it certified by independent organization, but let an established skydiving industry standard slide (confluence wrap should be at least 30% of webbing strenght). (For matter of completeness, the other manufacturers gear has been certified by german standards years ago as is stated on their website.) While i see that load and drop tests are necessary to verify a design, the resulting certifications seem like a marketing gag to be used as marketing tools (like a TSO has been used as a primary sales argument by yet another manufacturer). If a manufacturer sells a harness that is made according to industry standards I don’t need a certification to tell me that its going to be fine, however if they deviate from these standards it would be nice to know in which way.
Regarding the comparison of our gear with climbing equipment, with some people stating that the standards there are higher. I really don’t think thats accurate, climbing gear manufacturers also fuck up sometimes, just google “climbing gear recall”. (For example there was a climbing fatality due to gear failure in Austria 2 years ago that resulted in 10 manufacturers recalling via ferrata equipment (link).)
And when it comes to skydiving equipment, just have a look at this comprehensive list of service bulletins, some of the issues described there are also valid for base gear and worth reading.
By now our base equipment is actually pretty awesome, the manufacturers have been doing a great job keeping people from dying because of gear failure, and gear is constantly evolving. Looking at the size of the market, and the number of test jumps that can be done in a certain amount of time, its interesting to see people demanding a solution asap / a faster evolution of gear while complaining about being used as “test jumpers”.
</Rant>


Documents
Squirrel service bulletins and product modification procedure:
SB-14-8-1
SB-14-8-1-Update-1
PMP-14-8-1

Adrenalin base service bulletins and document showing improved design:
service_bulletin_25_06_2014_eng
soft_bars_en

Find waldo
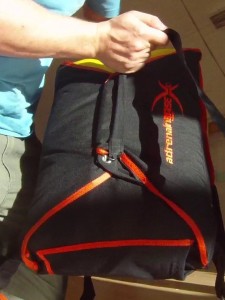
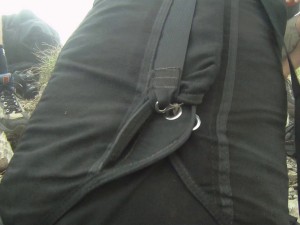
I had these pictures lying around for quite some time now (yes, this is a base rig) and finally have some use for them. After reading the above article, can you find the problems in this setup?

Posted in Documents, Safety | 3 Comments

GoPro anti-snag mounts

If you don’t know why an anti-snag mount is a good idea for BASE or skydiving, read this post first.

Here some links where you can buy anti-snag mounts
Cookie Fuel roller mount
luron01’s mount
Hegan mounts

Homemade anti-snag mounts


 Some help to build your own

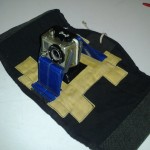
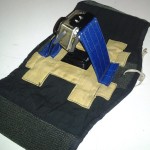
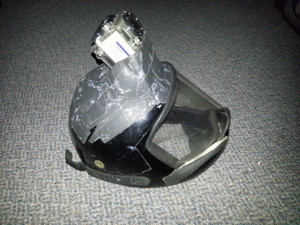
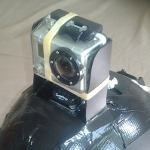
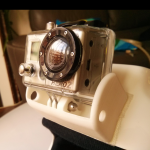
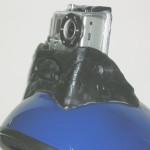
goprDownload a template for the PE sheet snag protector as PDF here. Print it out and then cut the shape from some plastic sheet (2mm PE-HD works best for me). Warm PE it with a lighter along the your marks and bend it around the camera. Try it out with stiff paper first to get the right location for the bends.

linebreaker

picture by luron01

picture by luron01

Download luron01’s 3D printable mount here (round surface) and here (flat surface), or order it via sculpteo. Please read the included README textfile, you are free to share those files, but the copyright owner (luron01) does not allow any commercial use! (Link to the original thread)

linebreaker

picture by Divalent

picture by Divalent

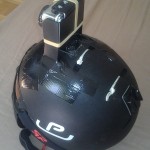
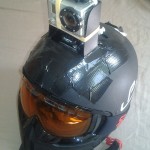
Or use some moldable plastic like InstaMorph or sugru to build some snag protection / deflector around the camera mount.

linebreakerThanks a lot to everyone that provided pictures. If you want to see your mount or snag protection added here, please send me some pictures!
Posted in Safety, Videos | 2 Comments

Snagpoints

This has been bothering me for quite some time so finally I come around writing something on this.

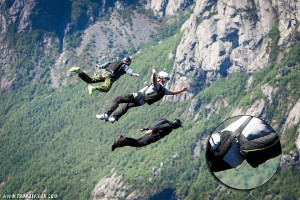
In the past 4 years we had 2 confirmed GoPro fatalities (BFL #158 and BFL #206). What troubles me the most with those is that everyone seems to shrug and continue business as usual. I was surprised by the fuzz that I caused, and the amount of feedback I got for the pinlock video and post, however, I’m not aware of any fatalities that were caused by this. Imagine we had 2 confirmed fatalities because of a problem/failure of a certain piece of BASE gear, be it a harness, container or canopy, there would be a massive uproar from the jumping community and pressure on the manufacturer to fix the issue.

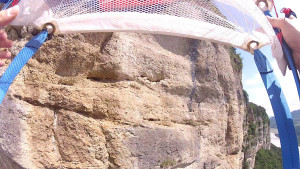
So why the heck is the majority of GoPro mounts you see in the field the snag prone version that comes with the camera, after we already had 2 fatalities? Anti-snag mounts are readily available from multiple manufacturers, also it’s not a hard task to build something yourself to reduce the snag hazard (see gallery here).

picture by jpforget

picture by jpforget

Safety wise there is NO downside of a snag proof mount, some of them are maybe less comfortable to put the camera in or out, or change the angle, but this is for once an improvement you can add to your jumping gear that has virtually no safety trade off.

Although both fatalities were slider down, I don’t see this problem isolated to those kind of jumps, nor to the location of the camera mount on your body. Even for tracking or wingsuiting its not hard to think of scenarios that would have some potential for an entanglement to happen (see here, or here), and what harm is done by using a better mount? If the shit hits the fan I would not count on the mount to break early enough to save your ass (see here) and since we won’t stop using GoPros, which is fine, I like them, we should at least invest a minimal amount of money and/or time to make them fitter for the environment were using them in, thus enhancing our safety by quite a bit.

Picture by Trond Teigen http://www.trondteigen.com/

Picture by Trond Teigen http://www.trondteigen.com/

And yet another thing kind of related to this, in the same time frame there were 2 fatalities in which the stashbag seems to have played some role (BFL #192, see also here, and BFL #231). I don’t really have s lot to say about this, it’s pretty straight forward, just use your brain and stow that thing in a place where no part of it can come out during free fall or opening to cause trouble.

All of this is actually pretty basic stuff that we all learned during our parachute license, from our mentor, during first jump course. To recap this: You don’t want to wear something that could snag a line, bridle, or something else, be it shoes with hooks, uncovered elbow pads, or similar stuff. And you don’t want to wear something that could in any way interfere with the opening like straps, strings, or any other stuff attached to you. But at a certain point in our career we seem to let this slide a bit and think it’s going to be fine because were more experienced.

I hope this whole rant doesn’t sound too preachy, I’m fully aware that any incident or fatality is a chain of things going wrong, but whether it was the main cause or just a little contributing factor it should alarm us. Don’t give any piece of equipment the chance to easily get you into trouble, no matter what your experience level is, don’t let this slide. To be noted, I do not say that you should start jumping a GoPro earlier in your career just because you have a nice snag proof mount, there’s quite a few more problems with cameras than being a snag point.

To finally add a bit of value to this rant, heres some links to manufacturers that sell anti-snag mounts, a few pictures of homemade ones, as well as some ideas how to make your own: GoPro anti-snag mounts

Thanks a lot to Trond, jpforget, and Berni for the pictures, as well as Michi and Shane for letting me use their videos.

Posted in Rants, Safety, Videos | Leave a comment

Softhousings

With a properly manufactured, maintained, and correctly assembeld 3 ring there is practically no chance of an unintentional cutaway. The obvious reasons for such an unintentional cutaway would be a getting the release handle snagged on something, a broken loop due to wear, etc. However, one thing that is getting overseen a lot is the riser end of the sofhousings.

To see what I mean lets have a look at a hardhousing first. The distance between the end of the housing and the grommet is rather small, so when the 3 ring release is assembled there is only a little portion of yellow cable exposed below the loop. Cutting away the riser by pulling the yellow cable out at this point without additional tools requires quite some fiddling around and is pretty much impossible when the riser is loaded and there is some tension on the loop.
hardhousing2Now lets look at a softhousing. The exposed portion of yellowcable below the loop is noticeably longer that with a hardhousing. To keep this to a minimum the softhousing is stitched up as far as possible towards the grommet.softhousing_a2I’ve already seen quite a few rigs where the softhousing tunnel hasn’t been stitched up that far, sometimes exposing quite a lot of yellow cable. This opens quite a big gap in between grommet and housing where something rather big like a finger or gopro screw can snag the yellow cable and release the riser even when under load.softhousing_b2pulledSo what’s ok and what’s not?
I honestly don’t know if there is a recommended practice for manufacturing softhousings for 3-ring releases. The 3-ring construction manual from UPT does not state anything about housings.
I found that on most softhousings this distance between center of grommet and the last stitch of the webbing tunnel is 1″ (2,5cm like on the first picture) or less, which is about as close as you can go with a regular sewing machine presser foot after the grommet was set. This is tight enough to make it very hard to pull the yellow cable out at this point, and again pretty much impossible when riser is loaded.
A good rule of thumb is, the more pain in the ass it is to release the riser (on the ground) by pulling the yellow cable out at this point, the better. So if you can easily release a riser with a finger, you should stitch the softhousing tunnel up closer towards the grommet.

Posted in Safety | Leave a comment

Pin orientation

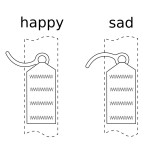
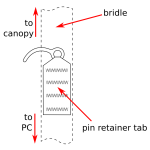
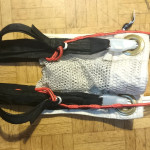
A more detailed view on the happy/sad pin orientation that I briefly mentioned in the pin-locks post. Thanks to Todd from Apex for pointing this out to me. Since I had a hard time wrapping my head around the whole thing I made a few pictures to make sure everyone knows what I’m talking about. The first two pictures show pin and bridle on a packed rig as if you could look through the bridle.

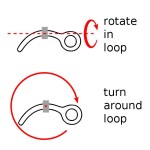
Scenario 1: The pin is “sad” and retainer tab sits on the bottom of the eye of the pin like in the pictures above. When pulling the bridle straight up and away from the container, therefore force is applied in “normal” pull direction the pin will first rotate in the loop and then slide out of the loop.

sc1_sadThis works like a charm and required force for both steps to happen should be rather low, of course depending on loop tension. (The term “pin tension” is a little misleading in this context because it normally addresses the force required to pull the pin, since this is the variable part here I go with “loop tension” when I really mean the tension of the loop.)
The force required to pull the bottom pin of my slider down rig (the one in the pictures) in this scenario is approximately 0.25 kg (~0.5 lbs), the pins were fully set.

Scenario 2: The pin is “happy” and retainer tab sits on the bottom of the eye of the pin like in the pictures at the top of this post. When pulling the bridle in “normal” direction, the pin cannot rotate in the loop like in scenario 1 because it’s tip tries to dig into the container, levering against the force applied by the bridle on the eye-end of the pin. So the pin has to turn around the loop before it can start sliding out of it.

sc2_happyThe force required to pull the pin increases significantly compared to scenario 1, the pull force measured on same rig as above reached up to 3 kg (~6.5 lbs), therefore around the ten-fold of the first measurements. (Again the pins were fully set.)

At higher airspeeds this is going to be less of an issue due to the increased pull force of the PC (and changing angle of the applied force as soon as you start moving forward / tracking / wingsuiting), but can become a problem if you’re doing short delays where you don’t want to have any hesitations in the opening process.

Scenario 3: The pin is pointing straight up. In this case the pin will turn in the loop to either, a more “sad”- , or a more “happy”- orientation, whichever is closer. From there scenario 1 or 2 applies.

To sum this up. Pin orientation matters! Do a pincheck before you jump, have the pins in a “sad” orientation, and if you’re going for a short delay, prime the pins, and leave your pin protector flap open.
Attachments
Apex Pin-and-Pin-Tab.pdf

Posted in Packing, Safety | 6 Comments

2013

Weather sucks so I found some time to through all the footage that I got from 2013 and put together a small video. Thanks a lot to everyone that jumped and traveled with me last year, to everyone that contributed footage, all the event organizers and staff, and everyone else.

vimeo.com/85851953

Special thanks to The Moguls and Short Handed Goal for letting me use their songs for this video!

“Kevin Says” by The Moguls
off the EP “30 Helens Agree”
facebook.com/ihatethemoguls
ihatethemoguls.bandcamp.com

“The Fall” by Short Handed Goal
off the EP “Adapt & Survive”
facebook.com/ShortHandedGoal
shorthandedgoalri.bandcamp.com

Edited with Kdenlive.

Posted in Videos | Leave a comment

Pin locks in detail

Since there was way more feedback on my last video than I expected I want to go a little bit more into detail. The described scenarios and pull orientations will most likely not happen in a slider up/ terminal environment, but can/do happen on a slider down jump.

As already stated in the other post, I’m not interested in criticizing any manufacturers, nor do I say that pin closed rigs are bad. I like pin rigs, I own quite a few, and I feel perfectly fine jumping them. A lot of people misinterpreted the first video as a pro-velcro/anti-pin video, which I can assure you, it’s not!

To make this a bit easier I divide pin closed base containers in two groups based on the design of pin protector flap:

  • Tuck-under, Pin protector flap is tucked under the same flap that it is mounted on. (eg. Perigee Pro, Zak, Hybrid, Apex DP, Vertex, etc…)
  • Tuck-in, Pin protector flap is tucked in a pocked on the opposing flap on the other side. (eg. Gargoyles, Apex TL, Summit, Atmosphere, etc… technically Prisms would belong here as well)

The main reasons for the pin locks that I found are:

  • Pin cannot rotate – Something is obstructing the pins path so that it cannot rotate into the direction of the pull force. So it is locked until either the angle is changed to something more favorable where the pin can rotate without being obstructed, or if the applied force is high enough for the pin to overcome whatever is in its rotation path to get in line with the force.
  • Pin cannot slide – The pin is able to rotate into the line of pull force, but it cannot be pulled because something is in the way behind the pin. It is locked until angle changes or force is getting high enough to get it over the obstruction.
  • Pin has to go around a corner – The pin is able to rotate, but is in between two layers of material and points in opposite direction of where it should be for the applied pull force.
  • Bridle joint has to go around corner – This works the same way as the last point above, but here the stiff part of the bridle has to go around a corner.

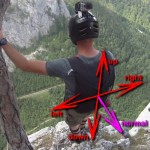
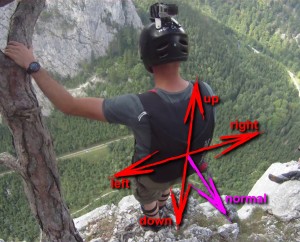
To make things a bit clearer lets define the pull directions and to which deployment position they fit.directions

  • Up – happens in head high / standing position.
  • Down – happens in head low / head down position
  • Left – when jumper rolls his body to the right side (right shoulder and hip down)
  • Right – when jumper rolls his body to the left side (left sholder and hip down)
  • Normal – when jumper is belly to earth

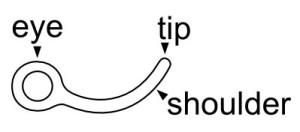
happy_sadI give the following names to the pin orientations when looking at the rig, happy and sad combined with side of the eye (eg. Happy left eye and sad left eye in the picture aside) and the parts of a pin.

pin The following list of base rigs is far from complete, its just the rigs that I’ve played around with, but most likely you will be able to reproduce one or the scenario on a rig of another manufacturers that uses the same flap design. Also the listed issues is not necessarily complete, so if you find something on your rig please let me know!  All rigs in the video had rather low pin tension, all of them can be opened in normal pull direction with less than 0.5kg force. (I’m aware of the fact that kg is not a unit for force…)

Zak 2, Hybrid, Ld+, Vertex (tuck-under, pin cannot rotate)

pin_inside_flap_zPin protector flap is on the right side. (with the Vertex its exactly the other way round since pin protector flap is on the left side, description below is intended for Zak 2, so switch left and right for the Vertex) Flap is closed. When bridle is pulled up, the pin can now either rotate clockwise, in which case you’re fine and it will open normally, or counterclockwise, in which case the shoulder of the pin makes contact with the pin protector flap at its bottom end and cannot rotate further.

pin_inside_flap_vSeverity: Requires quiet a surprising amount of force to open. Pull direction can be considered likely on a slider down jump, especially when doing gainers. Can be easily reproduced.

Remedy: Open pin protector flap, now the pin can rotate in both directions freely and everything is fine.


Perigee Pro, Zak 1, Apex DP (tuck-under, pin cannot rotate)

pin_against_bunched_flap_pFlap is closed. When bridle is pulled up the pin can either rotate counterclockwise in which case you’re fine, or clockwise in which case the pin protector flap material is bunched up by the bridle pulling upwards.  The pin then cannot rotate because its eye gets in contact with the bunched up flap material. (Apex DP locks when pin turns other way round, but locks for the same reason)

Severity: Requires sopin_against_bunched_flap_dme additional force to open. Pull direction can be considered likely on a slider down jump, especially when doing gainers. Can be easily reproduced.

Remedy: Open pin protector flap, now the pin can rotate in both directions freely and everything is fine.

Additional info: Take care with the pin orientation, if the wrong bridle is used or bottom pin is put in wrong way round (still vertical eye pointing down, tip pointing right) the same lock described in the point above (Zak 2, Hybrid, Ld+, Vertex) can be produced but here the tip gets in contact with the pin protector at the bottom end.


Gargoyle, WsX, Razor (tuck-in, pin cannot rotate, not slide, bridle joint has to go around corner)

The pin protector flap is on the left flap, the tuck pocket is on the right flap. (at least on the rigs above)

pin_against_tuck_open_gScenario 1: Flap is open. When bridle is pulled right the pin cannot rotate because the edge of the tuck pocket gets in contact with the eye.

Severity: Requires additional force to open. Pull direction is quite unlikely unless doing barrel rolls. Can be produced within a few tries.

under_tuck_rScenario 2: Flap is open. Bridle is gently pulled down and then further until it pulls right, slowly turning the pin without sliding it or standing it up, or when pins are oriented vertically and bridle is pulled right, so that part of the eye of the pin can go under the tuck pocket on the right flap. Once there it cannot rotate further and cannot slide, if rotated a bit back it cannot slide because the bottom end of the tuck pocket is in the way.

Severity: Force required to open this would probably damage something. Pull direction is quite unlikely unless doing barrel rolls. Takes some tries to reproduce, and does not work on all Rigs (due to different spacing between tuck pocket and grommet, but a little more on this further down)

Remedy: Pin orientation plays a big role so check it on exit and have them oriented horizontally reduces the likeliness of this by a lot.

bridle_gScenario 3: Flap is closed. When bridle is pulled up, the stiff part of the bridle where the pin is sewn on is covered under the pin protector flap and has to be bent around the bottom corner of it.

Severity: Requires some additional force. Pull direction can be considered likely on a slider down jump, especially when doing gainers. Can be easily reproduced.

pin_against_tuck_closedScenario 4: Flap is closed. When bridle is pulled to the right, the stiff part of the bridle where the pin is sewn on has to be bent around the corner, additionally, the pin cannot rotate in the pull direction before the flap is opened.

Severity: Requires quiet a surprising amount of force to open. Pull direction is quite unlikely unless doing barrel rolls. Can be easily reproduced.

Remedy: Open flap reduces it to scenario 1.

Additional info: Gargoyles became stiffer and stiffer over the years, so scenario 3 & 4 are less severe on old rigs that do not have any hard stiffener in the pin protector flap. On the other hand, the soft pin protector flap on those rigs get easily blown open on terminal jumps.


Apex TL, Summit (tuck-in, pin cannot slide)

tuck_away_tlUpdate: Flap order is wrong on the picture aside and in video. (It should be left flap first). If rig is closed the right way (left flap first), the resulting issue is then the same as Scenario 2 with the Gargoyles, if the pins eye, or part of it, goes in/under the tuck pocket. See detailed description above.

(Flap is open and folded back. When bridle is pulled left the pin rotates, but when it starts sliding the eye gets in contact with the edge of the tuck pocket under which the pin protector flap has been stowed away. Pin cannot slide further.

Severity: Requires some additional force. Pull direction is quite unlikely unless doing barrel rolls. Can be produced within a few tries.

Remedy: Leave pin protector flap open and not fold away, but this can potentially lead to similar problem at other pull angles.)


Prism (Single pin, kind of tuck-in, pin has to go around corner)

around_corner_pRig has been retrofitted with a stiffer pin protector flap since it opened on every terminal jump. Flap is closed. When bridle is pulled left, the pin is rotated to horizontal, but pointing the wrong direction, the pin has to move around the pin protector flap.

Severity: Requires some additional force. Pull direction is quite unlikely unless doing barrel rolls. Can be produced easily.

Remedy: Open pin protector flap.


Conclusion

  • For all tuck-under style rigs the problem can be resolved by opening the pin protector flap. Air stream is not an issue even for longer slider down delays or aerials. The downside of the open flap is that pins and bridle are exposed to snag points on the exit, with some rigs though it is possible to open the flap yourself by reaching back just before jumping.
  • For all tuck-in style rigs some problems still persist even with an open pin protector flap, although the pull angle is quite unusual and real locks are hard to reproduce.
  • The stiffer the worse. The more stiffener material there is in the flaps and pin protector flap the easier it is to reproduce any of the above scenarios.
  • Pin tension does not really play a big role in this.
  • This whole article is focussed on the rig design, while the pin design stays untouched, although theres room for improvement. I’m aware of this, and i want to go deeper into that in another post.

My thoughts on flap designs

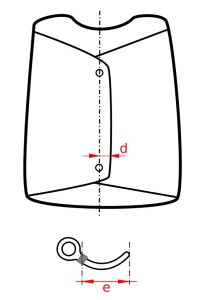
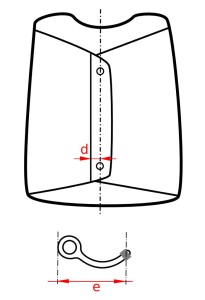
tuck-underTuck-unders: The main difference between the first and the second “pin lock” described in this post (shoulder of pin against inside of flap and eye of pin against bunched up flap) burns down to the relation between the distance of the grommet to the edge of the flap (d) and the maximum radius the pin needs to rotate around the loop (e). If the grommet is very close to the edge of the flap, therefore d considerably smaller than e, then the pin cannot rotate without getting in touch with the closed pin protector flap. One way to do this would be to move the grommet further in or the end of the closing flap further out, or by modifying the shape of the pin protector flap. (so that it would only cover but not tuck at the bottom). But by doing so one would eliminate the first, but not the second issue. Anyways, this whole problem can be resolved by opening the flap.

tuck-inTuck-ins: All “pin locks” described in the third and fourth point also burn down to a relation between pin length and something with the flap design. If the distance between the edge of the tuck pocket to the grommet/loop than the pins length from outside the eye to most outer loop position, the tuck pocket is close enough to obstruct the pin when rotating, or to obstruct the pin when it is pulled out of the loop. As described above, it helps to open the pin protector flap, but the issues still persist. Although the scenarios are less likely and harder to reproduce than the flap related ones.

bartacksBridles: The Bridle lock that was described above is of course getting worse the stiffer the bridle is and the harder it is to bend it lengthwise. On the newer Gargoyles the bartacks that join the bridle with the webbing piece that holds the pin are in line with the warp of the bridle (in the direction of the bridle), which makes it harder to bend the bridle at this point lengthwise than one where these bartacks would be in line with the weave.


Posted in Safety | 3 Comments

Pinlocks

Pretty much every rig design out there has some issues that at certain pull directions the pull force increases. This ranges from a little additional force that has to be applied to pop the pin, up to that the pin gets stuck completely until pull direction is changed again, from really uncommon pull directions that make this happen, to just being head high on deployment, and also from unlikely to happen, to easily reproducible. The reasons for this vary a lot depending on rig design, this can go from a pin being prevented from turning, pin protector flap material bunching up, the eye of the pin getting snagged, to the joint on the bridle where the pin is sewn on getting in the way, and so on.

With most rigs it is as easy as opening the pin protector flap to eliminate this issue. But more important, knowing the weaknesses of your rigs design. Which pin orientation is problematic, what pull angles can cause hesitations, etc.

All rigs in the video were packed with rather low pin tension, pin orientation and bridle routing as shown in the manufacturers manual. Some literally lock, some just require higher force to open, some are more likely to happen, some less. All of them severe enough to be able to lift the rig on the bridle and enough to at least cause a delay/hesitation in a slider down environment.

https://vimeo.com/76213539
Music: Cant Skate Here by The Boardlords / CC BY-NC-SA 3.0

I do not at all intend to criticize any manufacturer! All of the rigs in that video work just fine if operated properly. Although they ended up in one single video, they do not have the same issue, different designs have different problems, which may also differ in severity and likeliness to happen.

Posted in Safety | 3 Comments

Treelandings

Depending on where and what you jump you will end up in a tree eventually. I think there are very few jumpers that have more than a few hundred jumps and didn’t land in a tree at least once.

Landing in a tree isn’t actually that bad, on most treelandings that I’ve seen, the jumper walked away unharmed, and only a few did serious damage to their equipment, although sometimes things end up going bad. The main issue is that the outcome mainly depends on luck, since there are so many factors that cannot be controlled.

There is some stuff to know about treelandings, and how you can influence their outcome in your favour, so below there’s a list of Do’s and Don’ts that would raise your chances of being unhurt, but due to the fact that treelandings happen because something went wrong way before you were sitting in that tree, be it a low pull, strong winds, offheadings, linetwists, other malfunctions, you will most likely end up only being able to use a few of them.

https://vimeo.com/71594141


Do’s and Dont’s

  • Protect the vital parts of your body with the less important stuff. Use your hands and legs to protect your torso and head. Best to accomplish this is to ball up with your legs tucked up and crossed, using your hands to protect your head and face. This of course works best if you hit the tree frontal, if you got twists and are going backwards it obviously doesn’t help that much.
  • Flare! or go in deep brakes. Someone once said “Even when you’re about to land on a cop, don’t forget to flare.”.
  • “Land” facing the wind. Going downwind is going to hurt more…
  • You want to keep your canopy flying as long as possible, and get it stuck on the tree, to prevent you from falling. Pick a tree and try to get your canopy hang up on it, try to hit it in a way that so that your canopy contacts first, or at least at the same time as your body. (assuming you come from side and not from straight above)
  • If its thick forest, DO NOT go in between trees, doing that you got a pretty good chance that your canopy isn’t snagged but collapsed and you fall to the ground, or your canopy is snagged on one side and turns into the ground.
  • If the terrain is sloped, DO NOT go downhill into trees! If you go downhill your body will hit the treetops first, so basically your forward motion is stopped and your canopy will overshoot you and will not carry any load any more. So from there you would just fall. Go parallel to the slope. (even uphill is better than downhill)

Body armour

  • The more body armour you wear, the better. If you crash into something, you rather want to be dressed up as robocop than being naked. A spine protector can make a huge difference if you go into a tree flying backwards with linetwists.
  • Wear some kind of glasses! Your eyes are kind of sensitive when it comes to poking them with branches, having something in between them and the tree is a good thing. Skiing goggles do a really good job, especially the ones with the double anti fog glasses, they cover a quite big area of your face and its really hard to push something through.
  • A full face helmet is for sure better than an open one.

In the tree

  • Get a good hold and secure yourself if possible.
  • Check yourself for injuries.
  • Call someone to help you.
  • If possible open leg straps a bit keep more blood circulating in your leg and try to move your legs a bit to not build up a suspension trauma so fast. (more on this a little further down) This is especially important if you’re going to be stuck up there for a longer time.

Getting down

  • If you think you can climb down on your own, WAIT a few minutes, calm down, and think again if its safely possible and if you’re really capable of doing so.
  • Your health always has a higher priority than your equipment!
  • Carry a small box of dental floss! Dental floss is the shit when you’re stuck in a tree, its very light and small to carry around, it has a quite high tensile strength, you get 50-100m nicely rolled up in a box. When you’re stuck in a tree you can tie the end to a branch or something, throw the box down, so someone on the ground can attach a rope for you to pull up.
  • You should have basic knowledge about how to safely rappel. If you don’t already have basic rope climbing skills, maybe think about going to the climbing gym and learn at least the basics.

Suspension trauma

Suspension trauma happens if a person is held in an upright position (eg. in a harness) without moving for a period of time. This period is rather short, suspension trauma can build up within 20 minutes. Putting weight on the legs, moving them, widening a restricting harness, raising legs to a sitting position helps to delay suspension trauma.

“Typical symptoms are pallor, sweating, shortness of breath, blurred vision, dizziness, nausea, hypotension and numbness of the legs.” [1] and fainting. Injuries will of course worsen the situation.
Dealing with suspension trauma is kind of complicated, on one side, the pooled blood in the legs has to be put back in the system, or the suspension trauma will get continue, on the other hand, putting the blood back in the system too fast, eg. by lying the person down on the floor will lead to cardiac arrest when all the low-oxygen blood and all the bad stuff that collected in the legs suddenly goes back to the heart and brain. The whole thing gets even more complicated when the person is injured and or unconscious.

So if you get someone off a tree and you suspect a suspension trauma, do not lie them down! Get their upper body elevated, monitor health signs and get professional help.

[1] en.wikipedia.org/wiki/Suspension_trauma

Aftermath

rippedRips in canopy material are pretty common after a treelanding. As long as they are small and not in a high stress area they can be patched up with ripstop tape, else they must be properly patched right away.

Damaged lines must be replaced right away. If the line is only dirty (eg. green) from the tree its fine, but any broken strands or stitching has to be replaced.

Tree gum is pretty nasty stuff. Try to limit the area that comes in touch with it. If you find some stains, try to not contaminate other pieces of fabric with it to limit the damage. When you already found some when you got the canopy off the tree, do not stash the stained pieces with the rest of the canopy.

pulledstitchesBig stains will have to be cut out and patched. Smaller stains can be treated with climbing chalk. Scrap off as much tree gum as possible and take a good amount of chalk and rub it on the canopy fabric until it stops being sticky. Rather use too much chalk than too little. Do not use anything other than chalk! Dust, sand, etc. will damage the canopy fabric, while chalk does not do any harm to it.

Pulled stitching on canopy is also quite common. If the thread is still intact and the only a very small amount has been pulled out of the seam you can try realigning it with a toothpick or similar. If the thread is broken, or the stitching has been pulled excessively it has to be restitched.

Posted in Safety, Videos | 3 Comments

2012

I didn’t only do tracking jumps in 2012, so here’s all the other fun stuff! (with small bits of footage that was left from winter 11/12)

https://vimeo.com/58776605

Music:
“Addicted to freedom” and “Make it right”
by
Aintuse
facebook.com/aintuse

Edited with Kdenlive.

Posted in Videos | 1 Comment

Tracking 2012

Some jumps with my tube 3 I’ve done in 2012, nothing groundbreaking, but fun big times!

http://vimeo.com/58258777

Music:
“100 Reasons” by
Father And Gun
www.fatherandgunhc.com
facebook

thanks to Rise or Rust Records
www.riseorrustrecords.com

Edit and effects done solely with open source software, Kdenlive, slowmoVideo.

Posted in Videos | 1 Comment

I like PCA’s

Throwing newbies off the bridge and having fun on low stuff. Thanks to Aintuse for letting me use their song.

https://vimeo.com/52537714

Music:
“First song” by Aintuse
check out their Facebook page.

Posted in Videos | Leave a comment

Vents, close up

I borrowed one of those tiny HD cameras to play around with. It seems like there is just no image stabilization at all built into that small thing, so the videos are pretty much unwatchable, but a few stills are quite good. Any ideas where I should put it next?

Canopy is a Troll 265 MDV (old Troll, no DW)

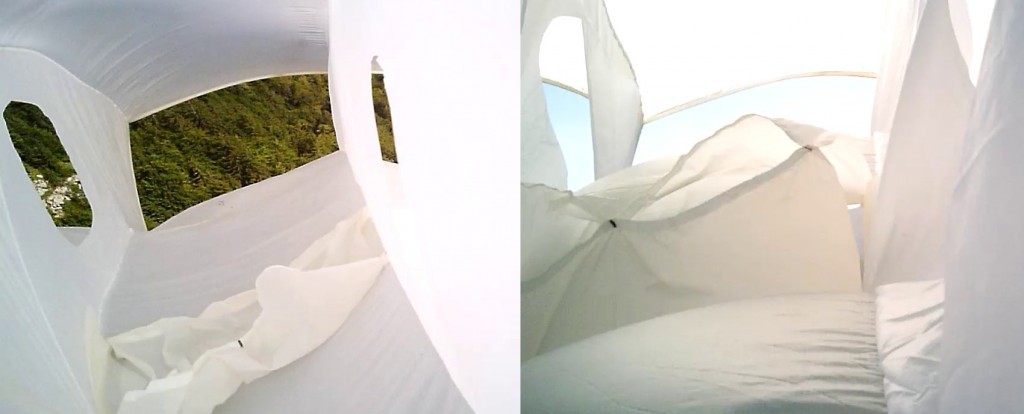
Closed vs. open ventsclosed vs open vents

And here what a stall looks like from inside a canopy (be aware, high resolution image…)
stall


Posted in Uncategorized | 1 Comment

960 RPM

http://vimeo.com/46570556

GoPro’s can take quite a beating…

Posted in Videos | Leave a comment

Kemaliye Cable Boogie 2012

Short video off an absolutely epic trip to Kemaliye (Turkey) in June 2012.

https://vimeo.com/45135990

Thanks to all the jumpers, organizers and everyone else I met there, it was awesome!
I hope to come back next year!

Music:
“corona” by minutemen
Very influential punk band from the 80’s.
Get the album “double nickels on the dime” on Amazon.
(please don’t sue me for using the song!)

Posted in Videos | Leave a comment

Visiting Austria

Due to recent events I found it necessary to put up some general information about jumping in Austria, I added a new page that can be found here and in the top navigation bar. Please repost, retweet, or link to the page (if you got your own site or blog), to improve search engine visibiltiy of it and help spread the information.
Posted in Uncategorized | Leave a comment

Brake line release toggles

I recommend the use of release toggles for slider up jumps, Adrenalin and Apex are selling mature release toggle systems, both work fine and risk of a premature is low to nil, with the Adrenalin version being my personal favorite. I’ve got 2 pairs of Apex WLO’s and 1 pair of Adrenalin Brake release toggles and have done around 300 jumps with them and never had any problems.

Apex – WLO toggles

A straight pin is used to keep the brake line attached to the toggle, the pin is partially visible so its correct location can be easily checked.
They are easy to rig up, and one must be pretty creative to mis-rig them.
The major downside I see with those toggles is that velcro for the release has to be opened to get the toggle off the brake line, therefore every time when packing slider up to down or the other way round. Since this is a pretty narrow piece of velcro it wears out quite fast and jumping with worn out velcros will heighten your risk of a premature release.
The ring that is used as a handle for the release has a little more snag potential than the rectangular tab on the Adrenalin toggles.
Manual for Apex WLOs

Adrenalin – Brake release toggles

The brake line is kept in place by a small TyII sleeving loop (closing loop stuff) and a yellow cable. They have to be assembled correctly, -> with the brake line entering the toggle on the side that the loop is sewn on as described in the manual, or else the brake line would pull the loop into the opening off the toggle and would need more force to be released.
The release handle has to be pulled down a longer way compared to the other 2 manufacturers toggles because of the over lenght of the yellow cable compared to that of a straight pin, lowering the risk of a premature.
For assembly it is not necessary to pull the release and open the velcro, just pull the yellow cable out and put it back in.
They can also be checked easily, and a stiffened rectangular piece of tape is used as a handle for the release.
They are a bit bulkier than the other release toggles. (that is also the main issue I heard other jumpers complaining about)
Manual for Adrenaline brake release toggles

Morpheus – HPBG toggles

Those toggles have been on the market for years, and the manufacturer writes that they “don’t really advocate the use of HPBG’s in most situations.”. They are not really popular, but I had the possibility to have a closer look on them.
There is a heightened risk of a premature release of a brake line with those toggles, there is no velcro or similar to hold the release handle in place and the pin that holds the line is hidden, therefore movement of it can go unrecognized, so they have to be checked before every jump.


All three of the above described toggles can be also used one handed (eg. toggle still attached to riser), although I would at least try to pump my brakes in case of a lineover and then release the brake line two handed. As I found out it is easier to drop the other toggle when using the release system to have the other hand free. As you can see on the video below, the brake line stayed on the Adrenalin toggle after the release is pulled because there was too little force on the brake line, so I had to separate it from the toggle by hand. (I think in case of a lineover the tension on the brake line would be high enough to pull the line from the toggle)

Both Apex and Adrenalin state that the velcros (the ones keeping them on the risers) can be replaced with ease, but compared to standard base toggles its actually quite a pain in the ass to do so.

http://vimeo.com/44349404

wtb

Posted in Safety | Leave a comment

Rigging up for handheld and thy bridle

I know, this maybe seems like a no-brainer for some of you, but over the time I have seen so many jumpers handle their gear in very awkward ways when rigging up for a handheld or staticline jump ending up doing something stupid, that I feel the urge to write something about this.

If your rigging up routine for handheld jump starts by dumping everything (rig, bridle, PC) out of the stashbag on the floor, or you don’t have any routine for this, read further…

I had quit a few good laughs in the past because of this, like when a fellow jumper dropped his canopy into deep snow, at -10°C in the middle of the night, on top of a building. But also a few occasions that gave me chills watching other people rig up with their bridle and PC floating all over the place, and I heard more than one story about accidental bridle misrouting that would have led to a total if not recognized prior jumping.

bridle misrouting death candidatesSo to not actually end up doing something stupid like the fellas above, there is a simple remedy for this:
Check bridle routing and stow PC and bridle in the BOC just like when going stowed before you put your rig in the stashbag. (If you use a staticline setup just stuff it in the BOC aswell.)
This way you can just take your rig out of the stashbag and rig up with the warm and fuzzy feeling that you do not risk popping your pins prematurely or death because of some stupid bridle misrouting.

stowedIf you utilize the bridle velcro for handheld jumps do something like this:

bridle velcro modIf the PC is too big to fit in the BOC without stressing the spandex too much, just stash the bridle and the mesh of the PC in the BOC:

big pilotchute stowedWhen geared up and all straps fastened, take out the PC, carefully pull out the bridle, and set up for handheld or staticline.

Another thing I also see a lot is that people hold the bridle on the risercover when picking it up. I personally don’t like this either, it’s better than no “bridle-control” at all, but you can still end up popping your pins when you step on the bridle, and bridle misrouting is also still an issue. (see death row candidate number 2 above)

Posted in Safety | Leave a comment

Ultra low freefall

Before hucking yourself off something really low, there are a few things you should know, most of them are described in the two PDF’s below, read them! Knowledge is one thing, the required skills another, so I cannot stress this enough, work your way down, slowly decreasing exit height!

“Ultra low freefall” by Dwain Weston (PDF)
This is a snapshot from the Apex Base site (10. Feb. 2012), as it was not possible to get the original text.

“Low freefall my thoughts” by Greeny (PDF)
This was originally posted on Basejumper.org, the thread has been deleted some time ago, a snapshot of the forum post can be downloaded here (PDF).

51m (167ft) freefall

http://vimeo.com/36546064

  • Troll MDV 265
  • Long cypres closing loops (oiled) and pins primed as hell.
  • 52″ ZP PC (Adrenaline Base, with support tapes on both sides)
  • Shallow break setting to get the canopy flying earlier to get a bit more flare power.
  • Head high exit, minimizing pendulum effect under opening canopy.
  • Standard 9ft bridle was used.
  • Only mesh of the PC folded in hand. (like a mushroom)
  • Throw PC upwards and forward.

Update 01.03.2012:
Here’s a video of a 50m freefall, thanks to Marek.

http://vimeo.com/37657653

  • OSP 305
  • 52″ PC
Posted in Safety, Videos | Leave a comment

Fall 2011

After fucking up my knee I’m grounded, so I had time to do some video editing. Here’s all the fun stuff from fall 2011 that I didn’t already post (here or here), October till December compressed in roughly 2 minutes and in more or less chronological order.

http://vimeo.com/35691742

Music: “Worst way” by Rubberfresh, available here.

Posted in Videos | 2 Comments

Low speed deployments

Quite a while ago I found this video on the apex site, and liked the idea to see how different canopies pressurize during low speed openings.

So here is what i got, all canopies loaded with approximately 86kg (jumper weight including clothes) and staticline deployed.

  • Troll 265 MDV
  • OSP 245
  • Mojo 260

http://vimeo.com/35154160

During the jumps for the video above I found out the being fast on toggles isn’t always a good thing, especially when releasing the brakes all the way on an unvented Mojo that isn’t really pressurized yet. But when it finally starts flying it has a lot of flare power to swoop the landing…

Posted in Videos | Leave a comment